If you’re reading this, chances are you’re either a maintenance manager at a construction site, a farm owner relying on consistent irrigation, or a municipal worker in charge of water supply systems—and submersible pumps are the unsung heroes keeping your operations running. As a submersible pump supplier, I’ve spent over a decade working directly with these tools, from answering late-night service calls to walking engineers through pre-installation tests that prevent costly breakdowns later. One mistake I see too often is rushing through testing, which leads to 30% more pump failures in the first year of deployment, according to industry maintenance data. Today, I’m breaking down how to test a submersible pump properly—with practical, on-the-job steps you can use, no fancy lab equipment required. Submersible Pump
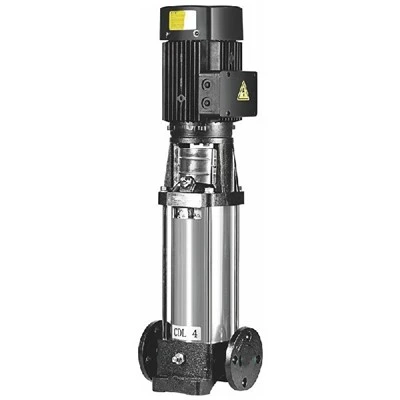
First, let’s get a foundational piece right: submersible pumps are not your above-ground sump pumps. They operate fully submerged in liquid, usually water, which means their testing can’t stop at a simple power check. Skip the pre-installation testing, and you might pull a pump out of a well that’s running dry because the suction line was misconnected, or damage the motor by running it without enough coolant. That’s why testing happens in three key phases: pre-installation bench testing, in-field commissioning, and routine in-service checks. Each phase serves a unique purpose, and I’ve learned from too many missteps that skipping one creates a domino effect of issues.
Let’s start with pre-installation testing. When a pump leaves our facility, it’s been factory-tested, but that doesn’t mean it didn’t get jostled in shipping. The first step here is the insulation resistance test, which checks if the motor’s winding has any damage that could cause a short circuit. Here’s how we do it: you’ll need a megohmmeter (a tool that measures insulation resistance) rated for at least 500V, which is standard for most 230V or 460V submersible models. Disconnect the pump from any power source and the control panel, then lower the megohmmeter’s leads: one to the motor’s terminal post, and the other to the pump’s metal casing. For a healthy new pump, the reading should be at least 10 megohms. If it’s lower than that, water might have seeped into the motor during transport, and you’ll need to let it dry for 24 to 48 hours before retesting. I once had a customer bring back 12 pumps because their shipping crates weren’t waterproof; they tested at 2 megohms, and after drying, every one hit 12 megohms—saving them thousands in replacement costs.
Next, a dry run? Wait, no—don’t run the pump dry here. You’ll need to submerge the pump in a bucket or a large tank of clean, cool water (room temperature is ideal; hot water can damage the motor’s internal components) for this next test: the power and flow test. This confirms the pump moves the right amount of water at the rated pressure specified on its label. First, connect the pump to a power supply that matches its voltage—using an incorrect power source is the number one cause of early motor failure. Then, place the pump at the bottom of the tank, making sure it’s fully submerged (no part of the pump is above the water line) and that the inlet screen isn’t blocked by sediment or debris. Run the pump for a minute, then measure the flow. For example, if the pump’s rating says 50 gallons per minute (GPM), you should get within 10% of that—so 45 to 55 GPM. If the flow is too low, check the impeller for debris, or confirm that the discharge pipe isn’t kinked; I’ve seen customers accidentally use a 1-inch pipe on a pump rated for 1.5 inches, which cuts flow in half.
We also test the pressure switch at pre-installation. Many submersible pumps rely on pressure switches to turn on and off automatically based on system demand. To test this, once the pump is running, attach a pressure gauge to the discharge line. The pump should turn off when the gauge hits its cut-out pressure (usually 40, 60, or 80 PSI, depending on the model) and turn back on when it drops to the cut-in pressure (often 20 PSI below cut-out). If the switch doesn’t trigger, it’s a sign it’s mis calibrated, and you should adjust it before installation.
Now, moving to in-field commissioning testing, which is where a lot of the real-world issues show up. Even if a pump works in a test tank, installing it in a well or a pond with varying water levels changes things. First, confirm the pump’s placement: it should be at least 10 feet above the bottom of the well to avoid sucking up sediment, and at least 2 feet below the minimum water level to ensure it never runs dry. Running a pump dry for even 10 seconds can overheat the motor because the liquid that surrounds it acts as a coolant—we’ve seen motors seize up in that short window, which is why this step is non-negotiable.
Once the pump is installed, do a live pressure and flow test. This time, you’ll need to measure the actual output of your system, not just the pump. Install a flow meter on the discharge line and check the pressure at both the pump outlet and the point of use (like a hose or sprinkler head). If the pressure at the pump is high but it’s low at the sprinkler, that means there’s friction loss in the discharge pipe—especially if the pipe is too small, or has too many elbows. I recommend using a pipe size equal to the pump’s discharge port, and keeping the pipe length as short as possible to minimize loss. Another in-field check: listen for unusual noise. A healthy submersible pump makes a low, steady hum; if you hear grinding, rattling, or high-pitched squealing, that’s a sign of a damaged impeller, a misaligned motor shaft, or even air trapped in the line. Air in the line causes cavitation, which damages the pump over time, so you’ll need to bleed the air out by opening a valve at the highest point in the system.
After the pump has been running for a few hours, do a thermal check to make sure the motor isn’t overheating. Use a non-contact infrared thermometer (you can pick these up at any hardware store) to measure the motor’s casing temperature. Most submersible pumps are designed to run at temperatures up to 104°F, so if it’s higher than that, check if the water level is dropping (running low) or if the motor is clogged with debris. I once had a customer who installed a pump in a pond that had a lot of algae; after three months, the motor was at 115°F because algae was blocking the inlet screen, restricting water flow to cool the motor. Cleaning the screen fixed the issue, and the temperature dropped back to 98°F.
Now, routine in-service testing—because a pump that works on day one can fail on day 180 if you don’t check it regularly. We recommend testing your submersible pump every six months, or more often in harsh environments (like construction sites with high sediment, or farms with heavy irrigation use). The key routine test here is the amp draw test, which tells you if the motor is working within its design limits. You’ll need a clamp-on ammeter, a tool that measures the amount of current the motor uses. When the pump is running at full load, the amp draw should match the rating on the pump’s label. If it’s 10% higher than the rated amp, that means the motor is working harder than it should—possible causes include a clogged impeller, low voltage, or a blocked discharge line. If the amp draw is lower, that could mean a leak in the line or a worn impeller that’s not moving enough water.
Another routine check is the inlet screen inspection. Sediment, leaves, and debris build up on the inlet screen over time, which reduces flow and can cause the pump to overheat. Every six months, pull the pump (following safety procedures—lock out the power first!) and clean the screen. In high-sediment areas, some customers install a filter ahead of the pump, which reduces how often you need to pull it. We make a custom pre-filter for our pumps that cuts inlet screen cleaning by 70% in muddy wells, so that’s a tip we always share.
One thing I can’t stress enough: safety during all testing. Submersible pumps run on high voltage, so never work on the pump or its wiring without locking out the power source and confirming it’s off with a voltage tester. Also, when submerging or pulling a pump, use a rated lifting rope (not a plastic cord) to avoid dropping it, which can damage the motor impeller or wiring. We’ve seen too many pump failures from simple accidents, and most of them are preventable.
Now, you might be wondering, “What if my pump fails a test?” For customers who buy pumps from us, we offer a 12-month warranty and free technical support to walk you through troubleshooting. If it’s a manufacturing defect, we’ll replace the pump—no questions asked. But most of the time, pump failures are due to installation or testing oversights, not factory issues. That’s why I always tell new customers to take the time to test every step, instead of rushing to get the pump running.
At the end of the day, testing a submersible pump isn’t just a chore—it’s how you extend its life, avoid downtime, and get the performance you paid for. Whether you’re installing a new pump for irrigation, a well, or a municipal water system, the steps I’ve outlined here will help you catch issues before they turn into costly repairs. We’ve worked with thousands of operators over the years, and the ones who test every stage have pumps that last 5 to 7 years, instead of 1 or 2. That’s a difference that adds up—especially for farms or businesses that rely on consistent water flow.
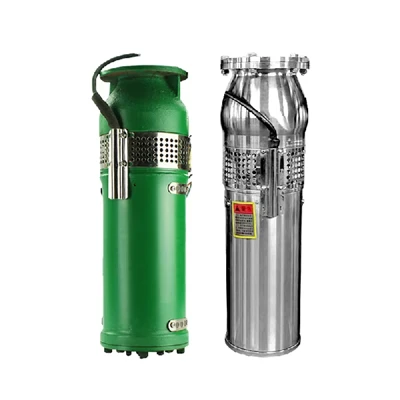
If you’re ready to purchase a new submersible pump, need help troubleshooting a current unit, or want to learn more about our testing and installation support, our team is here to assist. Reach out to discuss your specific needs and find the right pump for your application.
Plastic Solar Surface Pump References
Submersible Pump Maintenance and Testing Guidelines. Pump Industry Association, 2022.
Motor Insulation Resistance Best Practices. National Electrical Manufacturers Association, 2021.
Submersible Pump Failure Analysis: Common Causes and Solutions. International Water Association, 2020.
Longbiao Pump Industry Co., Ltd.
We are one of the most professional submersible pump manufacturers and suppliers in China, featured by quality products and low price. Please rest assured to buy discount submersible pump for sale here from our factory. We also accept customized orders.
Address: Unit 101, Building 11, Pan’ao Entrepreneurship Park, Daxi Town, Wenling City, Taizhou City, Zhejiang Province, P.R. China
E-mail: 1653746797@qq.com
WebSite: https://www.cnlongbiao.com/
